Showing posts with label conductive thread. Show all posts

Thursday, 9 February 2017

Printable soft circuits for Arduino, Microbit and Raspberry Pi

Image of an embroidered design printed onto cotton
The following idea developed out of a secondary school Creative Computing club I helped run. I had read that one way to engage more girls in coding was with e-textiles so I looked into ways that we could incorporate this into our club.

I have seen some impressive e-textile creations online but many of these involve significantly more sewing than actual coding. I was concerned that by introducing e-textiles to the club we would end up with students spending most of their time sewing rather than forging ahead with more challenging coding concepts.

I wanted something in kit form, with minimal sewing but which introduced students to the potential of e-textiles and soft circuits. It also had to be cheap as we had very little budget. Basically I was after a printable textile equivalent of kits such as this Christmas Tree kit:


Pi Hut's Christmas Tree Kit

or even better, something like this e sewing template from Spark Fun
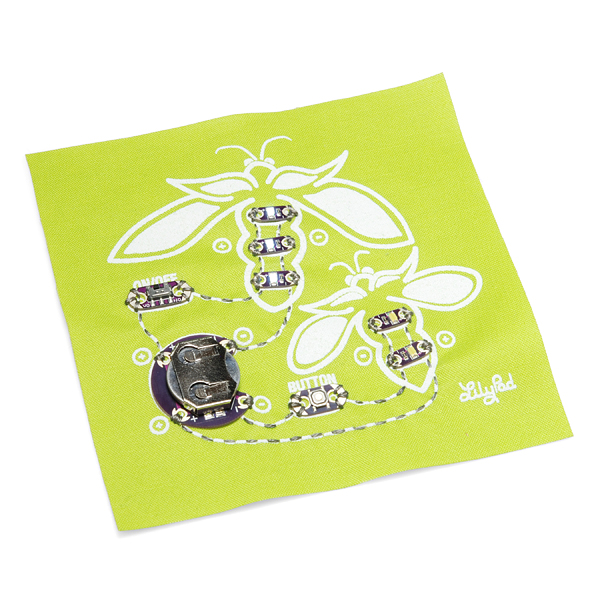
Lilypad e sewing kit
So, I turned to my old friend - a stack of inkjet T-shirt transfer paper - which I have called upon for many projects over the years. I found a suitable Christmas Tree Image online to which I added the following:
  • LED positions
  • resistor positions
  • guidelines for conductive thread
  • external connection positions
The image was then reversed,


printed onto T-shirt transfer paper, cut out and ironed onto white felt. Here is the finished article.

Completed Christmas Tree
I sewed this myself and presented it to the students as one of many ready-made projects for which the coding was the main goal. Another example was this training shoe:

Trainer Light Sequencing Project
And here are a couple connected up to a BBC microbit:


Once completed, these e-textiles were easy to store, reusable and robust.

Not only is this technique useful for introducing e-textiles it also provides an alternative to breadboard circuits and commercially made projects such as traffic light add-ons.

No special electronic components were used, just cheap LEDs and resistors which were attached with conductive thread. There are plenty of instructions elsewhere online as to the best way to sew these on. I use long nose pliers to twist the ends into loops, but scissors also work. Here are some of my efforts:


And for the terminals, I use small coils of copper wire. These can be attached easily to crocodile clips or to jumper wires:


Saturday, 4 June 2016

An Arduino Controlled Cyber Pet


As a volunteer in a creative computing club I was looking for ideas to inspire students and came across a collection of school project kits based on the PICAXE microcontroller.

One of the more interesting projects describes uses of microcontrollers in popular cyber toys such as the Furby. Here are some extracts from the manual for that project:


the inner workings of a Furby


Although we were working with Arduinos, much of the information provided for PICAXE microcontrollers applies equally to the Arduino and this looked like an excellent project to inspire my students.

And for anyone looking for clear descriptions of basic electronic components and microcontroller interfacing circuits the PICAXE manuals are brilliant.

So, I set about creating a cyber pet of my own using the components we were teaching the students about and the craft materials we had available. For the body of the pet I used a cheap soft toy dog (from a charity shop). Here is a video of the finished result:


The following components were used:

  • 2 LEDs for the eyes
  • 1 reed switch in the nose
  • 1 light emitting diode (LDR) in the head
  • 1 servo motor mounted on k'nex in the body
  • 1 piezo module attached directly to the Arduino
  • several resistors
The arduino and battery pack were hidden in the body.

As I had not soldered before I chose to use conductive thread to attach and link components.

LEDs, resistors, LDR and the reed switch were all attached to the inside of the head with conductive thread which was then attached to insulated wires. This required some thought in order to avoid short circuits. All of the sewing was within the head of the toy which was filled with stuffing. The circuit was planned out in advance of any sewing with components being added gradually and tested as I went along: 

planning out the circuit

The servo motor was mounted on a k'nex structure. This required creating extra screw holes in two orange pieces of k'nex. A lolly stick was attached to the servo arm to provide a mechanism for moving the head. 
k'nex motor support
Servo motors are great for beginners as they contain their own driver and can be connected directly to the Arduino. The motor I used was a tiny towerPro SG90; these are available very cheaply. The disadvantage of servos is that most are not continuously rotating, but for projects such as this they are perfect.

The finished cyber pet was used as a demo when introducing students to the project part of the club. I had also picked up a couple of Furbys in a charity shop as examples of very sophisticated commercially available cyber pets, but which included many of the components we were learning about:

demo furby

dissected furby
This turned out to be a popular choice of project for the students over the last few weeks of the club. Unfortunately time was very limited and most students only got as far as adding a motor to their own soft toys (enabling them to wag tails, nod heads etc.) but they all enjoyed the experience and hopefully got a feel for how commercial toys are developed.