Friday 23 November 2012

Fun with Lego WeDo and Scratch

Flushed with the success of reading external inputs from the PicoBoard into our Scratch projects I thought that we would take a look at outputs via Lego WeDo. This is Lego's Junior Robotics system designed for use in schools, but available for home use too. It mainly consists of a motor, a motion/distance sensor, a tilt sensor and a hub to connect to a computer.

Trouble is, at around £80 it's expensive and that does not include Lego's software (but you can use Scratch). The kit does come with instructions for 12 models which make full use of the included motor and sensors, but having taken a look at the plans I thought that my 11 year old son would probably prefer to experiment with his own creations.


Instructions for all of these models can be found at Ro-botica (probably also on the Lego site, but I couldn't see them) . The Ro-botica site is in Spanish, but all instructions are in English.

Besides, we have heaps of Lego at home already, including some older style 9V motors. So, being a cheapskate I opted to just purchase the USB hub for now as really we only want to experiment with motors. Still expensive at around £30 mind you.
The Lego WeDo USB Hub
It arrived and within minutes was connected up to our computer running Scratch. Selecting 'Edit', 'Show Motor Blocks' revealed the following extra blocks in the Motion section.


In order to use these blocks, the WeDo Hub expects a Lego Power Functions motor to be plugged in. But we don't own any. So, what next?

The Power Functions (PF) system is Lego's latest electrical system, replacing the 9V system which was introduced in the 1980s. PF is a four wire system and the older 9V system just used two wires; the connectors are not compatible.

Fortunately, one of the following PF extension cables can act as an adapter between the two systems. This allows older 9V system components to be connected into a PF system.

8886 extension cable 8871 extension cable
The dark grey connector at one end is a standard PF connector. The light grey connector is PF on the top and old 9V on the bottom. So, to connect an old 9V motor to the WeDo hub:

Connect the dark grey connector to the USB hub. And then connect the light grey connector either:

  • directly to the motor (if it has a connector on top like this one)

  • indirectly to the motor via an old 9V cable

  • or indirectly to the motor via an electric plate


Once I had connected the old motor I then played around with the Scratch controls, turning the motor on and off, changing the direction and changing the power. All worked as expected. However, bear in mind that the motor requires 9V to run at full power and the USB hub can only deliver a maximum of 5V.

I then tried a couple of other old 9V Lego components I had:

Electric Light & Sound Bricks: Town Siren + Twin Top Lights
On their own, these did not work when the motor control was activated from Scratch, but with the motor also connected I got sirens, lights and motor spin. And once current was flowing the motor could be taken off and the lights and sirens would remain on.

Now I don't pretend to know exactly what is going on here, but I suspect that the WeDo hub does not allow the current to flow unless there is something to draw enough current attached - maybe? Once current is flowing, you can disconnect the motor and still do things like change direction and power which result in dimming the lights and changing the siren tone. When you 'turn the motor off' from scratch the siren / lights go off and won't come on again without the motor connected.

So next, I thought that I would try putting a resistor in the circuit. I did this by cutting a 9V lead so that one end had the standard connector and the other was just two bare wires:

Adapted cable 5306b
A couple of crocodile clips, a resistor from my kids' snap circuits kit and bingo - lights and siren without the motor connected:


And, using the customised 9V lead, it can be connected to other non-Lego components. I have had success with MES light bulbs and other motors.

Not sure what we are going to do with all this knowledge, but my son has had some fun already. He created this Pirate Ship fairground ride (adapted from the Lego Wedo Ferris wheel instructions) and then I helped him add the lights. Unfortunately it is only possible to control 1 motor circuit from Scratch; I would have liked to have been able to use a separate circuit for the lights.


control for the pirate ship
Conclusions

I am glad that we have had the opportunity to play around with Lego WeDo and I think coupled with the PicoBoard my son can have plenty of fun programming and building. I may now buy a Lego Motion Sensor for him which will bring our total spend up to about £50, so the original £80 set starts to look like a good buy if you also need a motor.

I had hoped that we could use some plans such as from our Lego Inventor - Motion Movers set, but the 5V restriction does not give enough power to drive the models that I have tried so far.

It is a pity that only one motor circuit can be controlled from Scratch. However, it does look like there is a workaround by building a customised Scratch image. Instructions available here on the Scratch Forum, but I haven't tried them yet.

Be careful with any customisations, as I cannot guarantee that any of the above procedures will not damage your USB hub and/or computer.

Tuesday 13 November 2012

Computing at School


I am delighted and impressed to hear that my son's primary school is introducing Scratch into the ICT curriculum for Year 6.
"In our first ever Computer Science based unit of work, the children will be learning the fundamentals of programming using an online programming language – Scratch. They will invent a new platform game with their skills and test each other’s games. This is a fantastic new area for the school and one which will really challenge your children’s problem solving skills. If they would like to continue to explore this area of work at home, you can download the Scratch program from the following website:
http://info.scratch.mit.edu/Scratch_1.4_Download
It is free to use and great fun for all the family!"
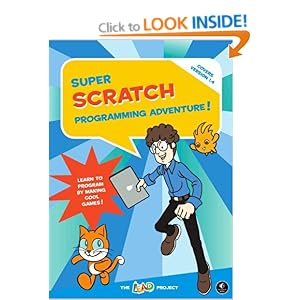
Coincidentally I had just introduced Scratch to him myself and he loves it. He started by just playing around with the program and then I gave him the following book, which I thoroughly recommend.


With this he has been able to follow instructions for ready made programs. He has then adapted them and introduced concepts into his own games. This is how I got started back in the 1980s on a Commodore Vic20 - typing in pages of code from magazines.

Scratch can also be used to control and interact with external devices via a Lego Wedo USB hub and/or a PicoBoard. And to make the homemade games feel a little more authentic, standard USB games controllers can be used via the fantastic Joy2Key program.

I have several projects in mind for my son to assist with and will report back with our results. In the meantime, I am about to fire off a letter to the school offering my help with this exciting development.

Introducing programming such as this into primary schools requires a teacher or two that are very 'e-confident' and I feel very lucky that my son's school has such teachers. If you would like to see such innovation in your own child's school, then check out Code Club which is busy setting up "A nationwide network of volunteer-led after school coding clubs for children aged 9-11".

Sunday 11 November 2012

Tangram Animation

Whilst tidying up the hard drive on my computer I came across a number of half baked animation projects from some sessions I ran at my kids' junior school. One of the projects was this simple tangram animation which was filmed on a Digital Blue camera by some 9 year olds.

As we only had a couple of cameras at the time, this project worked well in a round robin fashion with each child being able to choose the tangram character they wished to animate. I think we did create a longer film, but I don't appear to have that at home.


I've decided to give the project a makeover, this time by lighting from below to give the effect of a shadow play. I've experimented with this style before using a Digital Blue camera, but I wanted to see if there were any improvements that could be made now that I have upgraded to a Microsoft Lifecam camera and ZU3D software. Here is the result:


The technique involves mounting the camera above a lightbox. The lightbox I use is small (size A4) but perfectly adequate and ideal for use with children. For more details please see my website, here.

My animation station!

In the past I have cut out the foreground scenery from black card and stuck it directly onto the lightbox. However, the ZU3D software allows images to be imported and placed on a separate track to your stop motion frames. This has made things a whole lot easier. It also means that more elaborate scenery can be designed. I created this background image in GIMP (the white parts are actually transparent) and saved it as a PNG file sized 640 x 480 pixels to match the default dimensions for my camera in ZU3D.

Scenery - click to enlarge, save and then import directly into your project.

 and then imported it into ZU3D:


I then added another video track below the scenery and started to capture frames. The green hue was provided by green cellophane placed on the lightbox (we didn't use this in the end). I used to be able to get a similar effect using the Digiblue's software, but I can't seem to find such a feature in ZU3D. Oh well, you win some, you lose some!


I have been so pleased with the way that this has turned out and hope to come up with some more project ideas for the future.

The small tangram characters were all printed onto black card and cut out. This can be tricky to see, especially for a child; an easier method is to print onto white paper and then transfer to the card by rubbing white crayon or pencil onto the back.

Here are all of the characters used in the film - right click to save. Searching on the internet will reveal lots more that you can copy.


And here is the tangram square used to create the transformation animations:

Right click, save and print onto black card.


Saturday 10 November 2012

The ideal lunch box system


I've been packing lunches for my kids for the past nine years. Like most parents, I started out with an insulated lunch box like the ones above and filled it each morning with such things as cling film wrapped sandwiches, a piece of fruit, and a yogurt. Each afternoon it would come back smeared with a cocktail of crumbs, yogurt, banana skin and apple core - yukk! And however carefully you sponge clean these things, after a few weeks at school they take on an unpleasant aroma that is hard to shift.

So I went on the lookout for something else to contain the lunch that would be easier to clean.

Inspired by the laptop lunch idea which consists of an insulated bag and bento style containers I assembled a cheaper alternative using things readily available in the UK at the time. And here it is:


  • Insulated lunch bag - the standard rectangular bag found in most supermarkets, John Lewis etc. Approximate size 23 x 20 x 6cm. 
  • Addis Clip and Close 1.1l with inserts - available in Robert Dyas, Tesco and online. It has one main compartment (great for sandwiches, pasta, rice etc.) and two side compartments (salads, snacks, puddings etc.)
  • Sistema twist n sip 330ml bottle - available in most supermarkets and online.
  • Mini lidded storage pot, approx 100ml - the one shown was made by Buchsteiner and was purchased at Lakeland. Similar available on ebay - search for 'mini storage pot'.
  • Bento accessories - lots of small coloured pots available on ebay along with rice moulds, egg moulds, picks. I occasionally make use of these for ketchup, mayo and dips.
I have four of the main containers, two of which I have had for more than six years and they are still going strong (except for one broken flap caused by forcing the container shut with an apple inside). The containers all go through the dishwasher without problems (some minor warping has occurred to the inserts). The insulated lunch bag stays fresh and can survive at least a couple of years of use (my kids are trained to stick all their rubbish inside the container and to shut the lid). And I hardly ever use cling film now.

A typical lunch - tuna mayo pitta, cherry tomatoes, yogurt with fruit, water. No cling film for this one.

The main container has a leak proof seal and I have never had one fail. However, the inserts do not create a tight seal against the lid, so it is possible for food to transfer from one compartment to another. For most foods this is not a problem and for the others I just wrap some cling film over the top.

Sadly the smaller pots pictured are no longer manufactured. I found some very similar pots on ebay, but they have not been quite so reliable and we have had some leakage. So the hunt continues for a suitable alternative.

Having got the lunch box system sorted, what should you pack in it? Here are a few ideas - more coming in future posts.

Sushi
Pizza
Sandwich
Tortilla
Fruit Salad
Bananas & custard
Sausages & ketchup
Lamb kofte & tzatziki

Tuesday 6 November 2012

Adding sound to wall displays

Each term, my son has to complete a 'project board' on the topic his class has been studying. He is provided with a piece of card (size STRA2) which he is expected to fill with mounted pieces of writing and artwork relevant to the topic. He is also encouraged to 'be CREATIVE'. This usually means some form of interactivity, a game for instance.


For his last project board on 'Rainforests' I bought a sound module like you find in some greetings cards and he created a 'lift the flap for sounds of the rainforest' element.


As this went down well last time (especially with his peers), he asked for another one for his 'World War 2' project board.

They are very simple to setup. Here are instructions for creating your own 'lift the flap for the sound of ...': You will need a recordable sound module such as this, a piece of card cut according to the template and some thin double sided sticky tape. For the card, we used an old folder.

  1. Cut out the card and fold where indicated.
  2. Choose and record your sound according to the instructions provided.
  3. Carefully stick your sound module onto your card.
  4. Cut two strips of double sided sticky tape and apply:

  1. Fold bottom flap to cover the sound module.
  2. Add writing and artwork.


As the modules are re-recordable, it may be possible to re-use them for future displays but I have not tried this.